Tag Archives: review

Uberbike Finned Brake Pads initial thoughts

In order to slow down we pull on the brake lever which in turn pushes fluid down a hose and pushes the caliper pistons.  This moves the brake pads onto the disc surface where the kinetic energy of the disc is changed it heat energy and thus we slow down.  This energy transfer for most day-to-day cycling is relatively gentle and wont effect braking.  However, long sustained  or heavy braking will cause significant heat build up that in turn will cause brake fade which isn’t a nice feeling to have.  There are various ways in which companies try to manage this, hope use two piece rotors with the aluminium spider sinks heat away from the stainless steel braking surface.  All rotors are drilled which less any gas build up between pad and rotor escape, while hope actually make a vented rotor.   Shimano make a two piece rotor and also have an ice-tech variant  with a 3-layer sandwich structure of an aluminium core and two stainless steel outer layers.  Shimano also have ice-tech finned pads that act as a heat sink further reducing heat build up.  Using both the ice-tech pads and discs can reduce heat by up to 150 degrees in lab tests.  Independent Velotech test results can been seen here

The downside of the shimano finned pads is the price, they are not cheap.  Thankfully there are a couple of options.  Koolstop make finned pads called the Areo-kool pads  while Uberbike make a two piece system that means you only have to replace the pad insert when it wears down.
Uberbike SaintZee finned pads

The Basic principle of the fins is to take the heat away from the pad into the area outside where the air can cool it down, similar to the heat sink and fan of a computer processor.  So does it actually work, well in Uberbike’s lab test they show up to a 50C reduction
uberbike finned pads test
Since my front Zee and rear SLX didn’t have finned pads I splashed out on a pair.  They cost £13.99 for the race matrix pad and finned back plate, with the pad inserts cost £6.99 and £8.99 for sintered and race matrix versions respectively.  This compares to £16.99 for the Shimano SLX finned or £23.99 for the Zee (you may find them cheaper)

The pads fitted without any issue then I bedded them in.

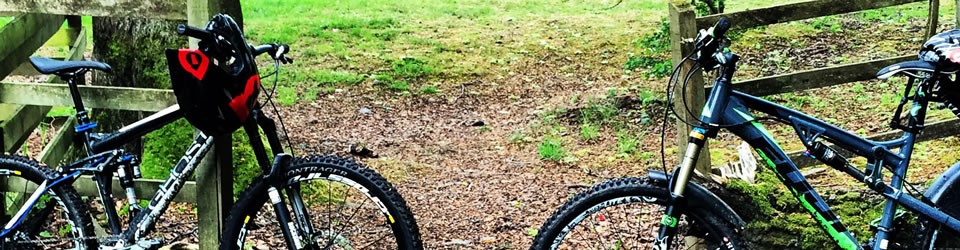
Zee with 203mm XT Ice-tech rotor

Zee caliper uberbike finned padszee caliper uberbike finned pad

SLX with standard XT 180mm rotor
SLX caliper uberbike finned padSLX caliper uberbike finned pad

Visually there is nothing to tell these aren’t actually shimano pads if you care about that kind of thing and for commuting the race matrix compound gives good initial bite with no squealing in the dry.  Gentle braking is not what these pads are all about.  To see if the fins do what they are supposed to do I purposefully dragged the brakes and then felt the fins to see if they were indeed transferring heat from the pad inset and they were quite warm to the touch while the calipers were cool.  The same test with non finned pads, heats up the caliper which means the fins are sequestering heat away from the rotor and caliper allowing you to brake for longer before fade.

I’ve not had a chance to test them at some proper DH tracks at Innerleithin yet but I have managed to have a play at my local natural trails in Pollok park.  These are 30s long natural DH trails with jumps, tree roots and a fair bit of mud at this time of year.

Although the short nature of the trails means I can’t efficiently test the heat dissipation of the pads I can test the bite and modulation.  The damp muddy conditions provide the perfect conditions for this as too much power too quickly means sliding and crashing.  The rear brake never locked up unless I wanted it to with good modulation between traction and skid.  The front pads didn’t have the initial bite of the previous shimano resin pads I was using but there wasn’t a huge amount in it.  The modulation was good with the bike slowing down without any loss of traction in the mud which I did actually get with the shimano pads.  I had a couple of incidents where I needed to stop quickly to avoid a tree stump or two and the race matrix compound did the job.  The brake calipers stayed cool with every run but the real test will be at longer tracks.

Overall with this initial test I’m quite happy with the pads, the fins do the job they are designed to do while the pad compound offers good initial bite while keeping a decent amount of modulation.  The two piece nature of the system means you can cheaply buy a new insert or change compound if that’s your thing.  Uberbike are only offering the complete system with the race matrix pad so if you are not a fan of this compound you will have to splash out on the sintered insert.  Adding more compounds to the range would give consumers more choice as would selling the current sintered compound with the finned backs.  I will report back with a longevity and proper DH test later.

Are fancy expensive gear cables worth it – a mini review

As I built my current bike frame up there was complete control over all components.  Some components are chosen because they are right colour or weight or just the fact you are comfortable with them e.g my 20 year old time ATAC pedals.  Most of my bike was built with mainly budget in mind but also I wanted good performance and weight.

When it came to set up my rear mech (I run a 1×10) I was just going to buy a normal cheap cable set, after all my cable was completely enclosed so was at little risk from dirt getting in.  Eventually I went with a jagwire mountain pro kit just to see if there was any actual difference between a £3.5 and a £21 set of gear cables.  As it turned out I didn’t really feel any difference but this was probably down to not trying the cheap cable before hand.

As the months went by I changed my handle bar from an Easton haven carbon to a Kinesis strut R750.  However, the cable on the gear shifter was too short to  fit so I had to fit a new one.  This time I went with the cheaper option of a clarks basic kit.  The kit was fitted simply enough and the gears changed correctly.  Now I had a direct comparison between the expensive Teflon coated jagwire kit and the basic cheap kit.

So was there a difference, well yes a huge one.  The cheaper cable kit  required significantly more pressure to change gear and wasn’t not so smooth at changing up or down.  The biggest issue was that after one ride in the mud the down shifting almost went completely.  Even though the cable is enclosed all the way from the shifter to the mech, enough dirt and water had got into the cable at the mech to cause shifting issues.

With the local conditions not set to improve for a couple of months I bought an Uberbike performance series gear kit which feature a lightweight compression-less housing with Kevlar fiber overbraid, pre-lubed liner for silky smooth operation, and our pre-stretched PTFE Slick Stainless inner wires.  The kit comes with enough outer to do the rear and two inner cables.

The difference is monumental, supper slick shifting and much more protection from the current elements.  They come is different colours as do the jagwire kits.  Uberbike also offer hydraulic hose kits for your discs if you want to match colours or require a new one.

So are expensive gear cable kits worth it – the answer is most definitely yes.  I used mine with and SLX shadow plus and SLX shifter.

Cane Creek DB inline first ride review

When I originally built up my Ghost ASX plus I purchased a pushed  fox Van RC from TFtuned.  TF took my weight, bike specs and riding style and valved the shock accordingly with the correct spring weight.  The shock performed amazingly over roots, rocks taking big and small hits in its stride.  The downside is the shocks weight at over 750g it was a bit porky for my tastes.  I replaced it with a 2014 model rockshock monarch RC3 plus which as 350ish grams gave a significant weight saving.  The shock performed pretty well for the most part but the tune and air can wasn’t suited to my bike.  I ran it for 9 months and never got full travel with 30% sag so I could have either purchased the debonair air can and got it tuned or sell it and buy another shock.  I decided to go for the new shock and have went for the Cane Creek Double Barrel inline shock.  There are plenty of pages on the web that describe the shock so there is no point going into the specifics but the adjustablity of the shock means I can dial it in to my preference without having to send it off and hope the tuning is spot on.  Although the inline has no piggy back it weighs the same as my monarch does.  However, compared to other non-piggyback shocks it contains ~40% more oil than comparable shocks.

I purchased the shock from TFtuned again as they will help set it up, discuss any issues you have over the phone and supply the correct hardware for your bike also their customer service is second to none so I’m happy to give them my cash.

My bike utilises a horst link and a 190x50mm shock to give me 140mm of travel.  This is a high leverage ratio and I found with my monarch that the standard air can ramped up too much at the end stroke to give full travel and the rebound just wasn’t strong enough to control the bike on high speed hits.  The DB inline has a larger air volume and it can be adjusted with the supplied rings (you don’t have to take the shock off to fit them either) should I find there is not enough ramp.

Fitting the shock was easy enough as was setting sag.  My monarch plus was pressurised to 150 psi for 30% sag, while the DB inline was 170 psi.  I didn’t bother adjusting the settings TFtuned had made as I wanted to see how the bike rode to start with.

My first run of the bike was at the commonwealth games circuit at Cathkin Braes. It was well suited to testing the shock as it has a range of surfaces and drop offs around its 3.6 miles.  It was a mainly leisurely ride as I took my 9 year old son with me but it was enough to let me get a feel for the shock.

The shock is paired with a RS pike upfront also set to 30% sag and I was running it with no added LSC.  The first thing I noticed was how good the small bump sensitivity was compared to the monarch.  I was able to ride smoothly over the rock garden and the rebound kept me from bouncing all over the place while seated on tree roots.  Pedaling efficiency is very good considering the plushness of the shock and it improved greatly with activation of the CS lever.  The CS lever can be moved to any position between off and fully on giving increasing effects pedalling efficiency.

The monarch was very good on big hits and jumps, I always felt in control on my landings.  The DB inline is just as good although I am planning to increase HSC to help with bottoming out as I do bigger hits at Glentress so It will probably be worth while having settings for each place I go to.  The Shock also give me more pop off jumps compared to the monarch which was welcomed and I can tune this out if I didn’t like it.

Over all for the first ride I am very impressed with the way the shock has performed particularly for the increase in control over roots and rocks.  I don’t profess to be a great mountain biker or know a huge amount about suspension tuning but I do see the Cane Creek DB inline as a great improvement over the monarch I had on previously and on a par with the pushed fox Van RC.  However, the monarch is not a bad shock it’s just the tune and air can wasn’t totally suited to my bike, weight, riding style.  I can’t comment on the debonair air can although I imagine this would make small bump sensitivity better but it will probably still need tuned as they only sell it in MM tune aftermarket which won’t suit every bike.

My settings the Dave from TFtuned set my DB inline to are as follows

LSC – 5 clicks  from minimum

HSC – 1 turn from minimum

LSR – 14 clicks from maximum

HSR – 1.5 turns from maximum


I’m 80kg kitted up and air pressure was 170 psi for 30% sag – I’ll be adjusting the HSC 1/2 turn at a time to limit bottoming out and the trail setting guide Cane Creek provide is very good at explaining what the different settings do.  You can also view it online here


The eyelet diameter of the DB inline is 15mm so you can fit RWC needle bearing kits to your shock.


Tf tuned can be contacted at http://www.tftuned.com/ or by phone 01373 826800.